.jpg)


A Note on Website Builders
These tutorials are done with a Webflow website site settings in mind - however, there are only a couple of software that need to be placed in the header of your website.
All of the other software that we cover simply need to be placed in Google Tag Manager (GTM) which means for 7 of the 9 pieces of software we cover, the process will look the same for us as it will for you, regardless of what your website is built on.
That's the power of setting up your marketing tech stack efficiently.
How to Install Google Tag Manager on a Webflow CMS
Google Tag Manager (GTM) is a great way to organize code on your website and to allow your team to access scripts without needing backend website access.

It is also great for publishing code, without publishing changes to your website's design.
So this is how you can install GTM on your Webflow website.
- Visit Google Tag Manager "Create an Account" Page
- Select Create an Account
- Name your account and select "Web" & "Create"
- Read & Confirm GTM's policy
- Copy the Header Code into your clipboard and paste into your Site Settings on Webflow
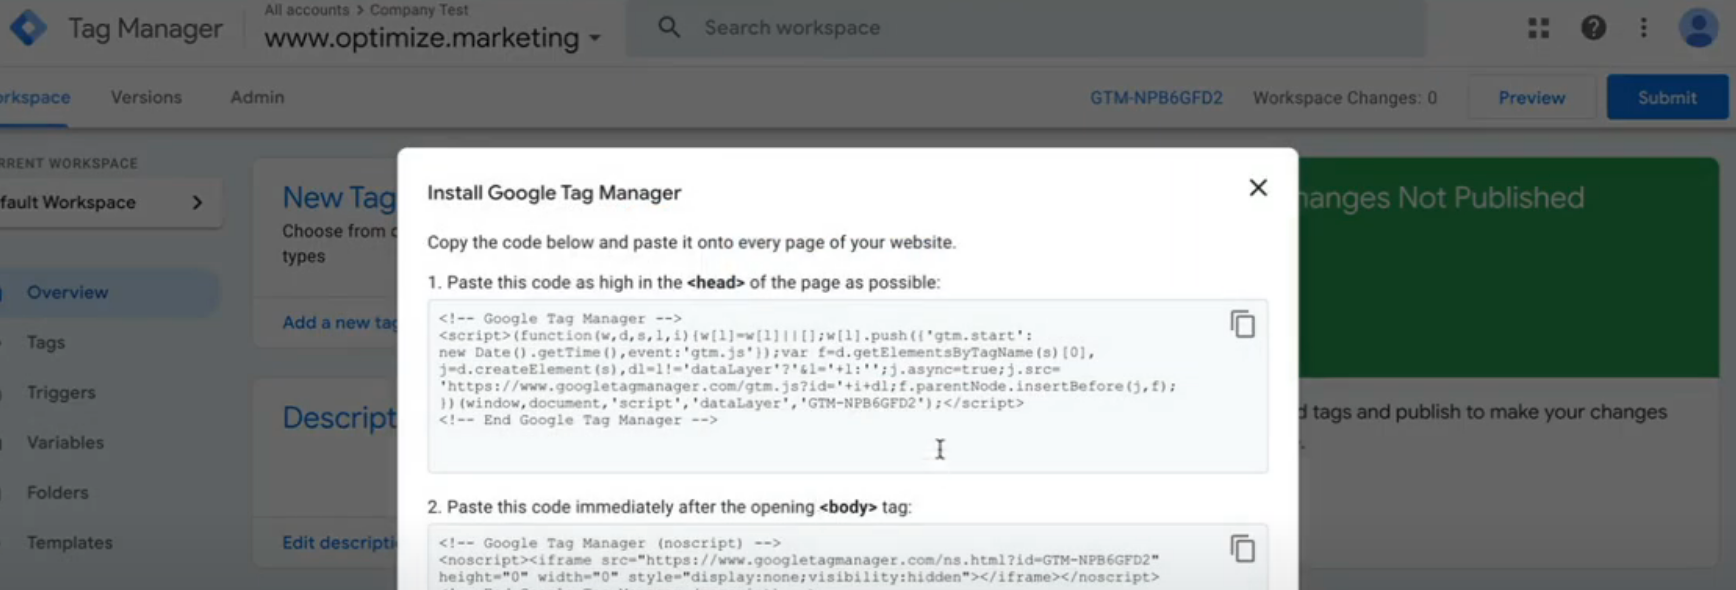
You can access the Custom Code Panel by selecting Site Settings and selecting Custom Code on the left-hand panel.
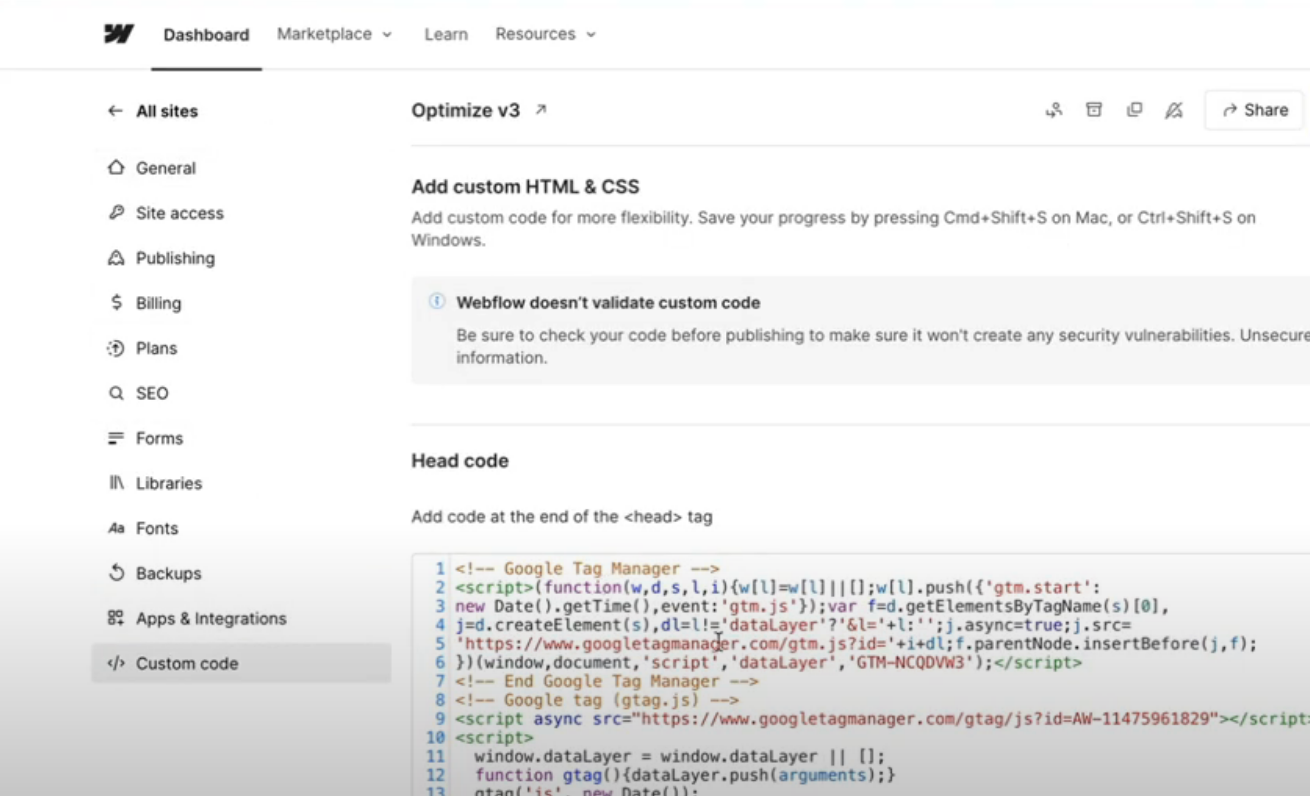
Last, all you need to do is select Publish on your Webflow website and voila, the GTM is installed!
How to Install Quantitative and Qualitative Data Measures On Your Website
The following pieces of free tech will relate to measuring and tracking data on your website.
How to Install Google Analytics 4 (GA4) on Google Tag Manager (GTM)
GA4 is a great way to capture quantitative data on your website.
You can use GA4 to measure site traffic, traffic sources, time on page, and much more.
Here is how you can set up GA4 and place it on your GTM which is already installed on your website.
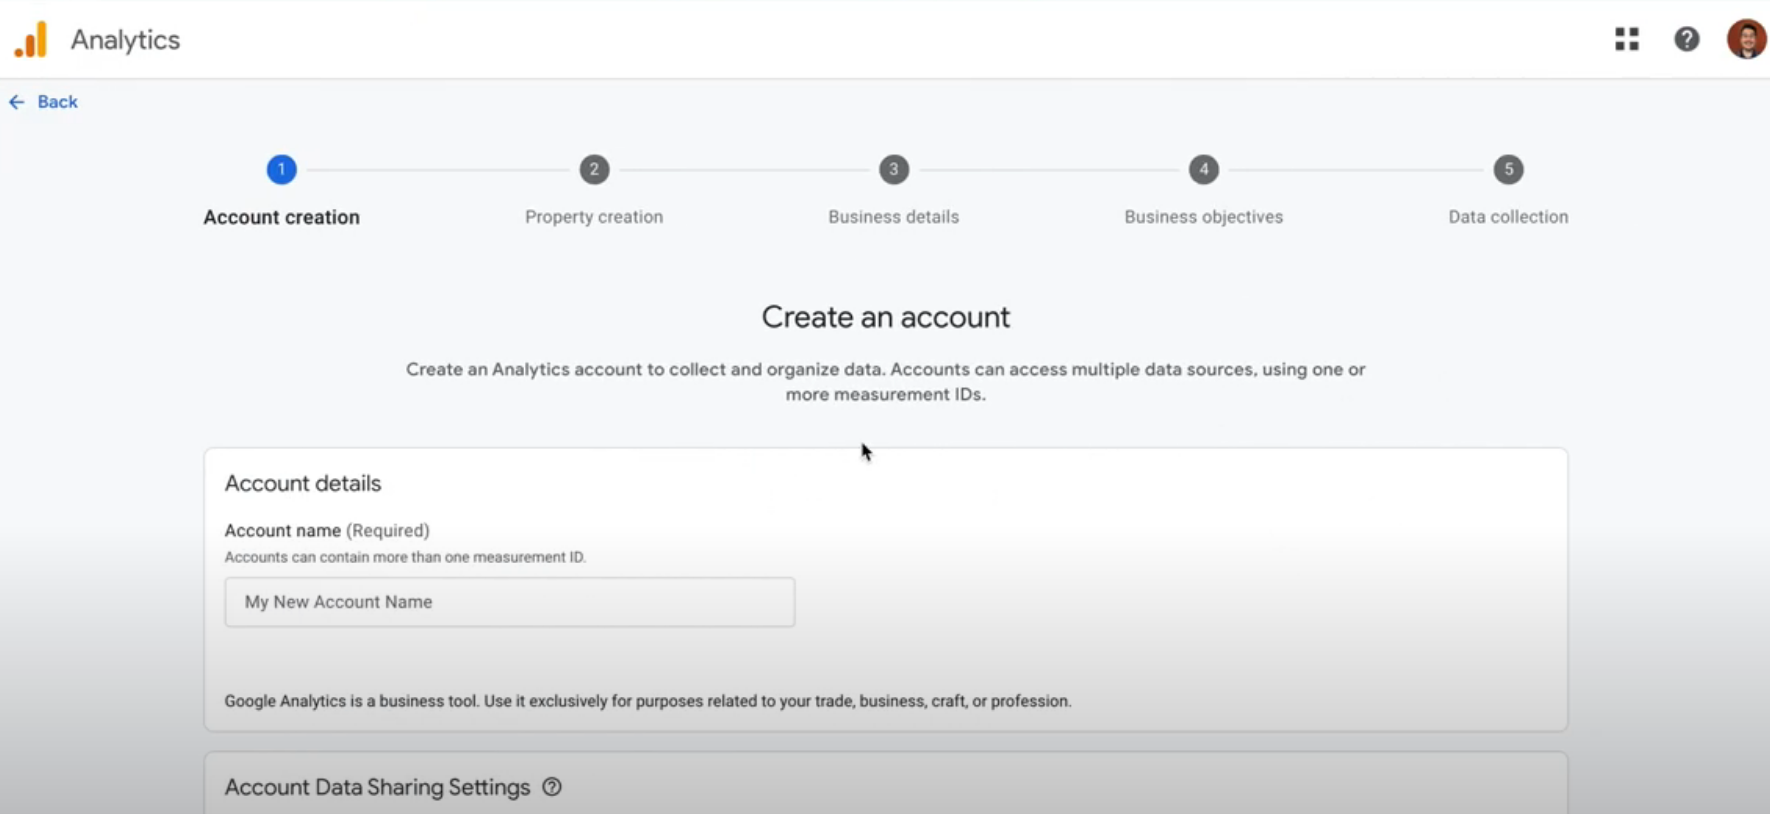
- Visit Google Analytics 4's website to create a new account
- Create the Account by simply selecting an account name, property details, and answer Google's questions (these questions do not affect your account - it's just data Google uses)
- Next, Select Web for a data stream and place your website name in there.
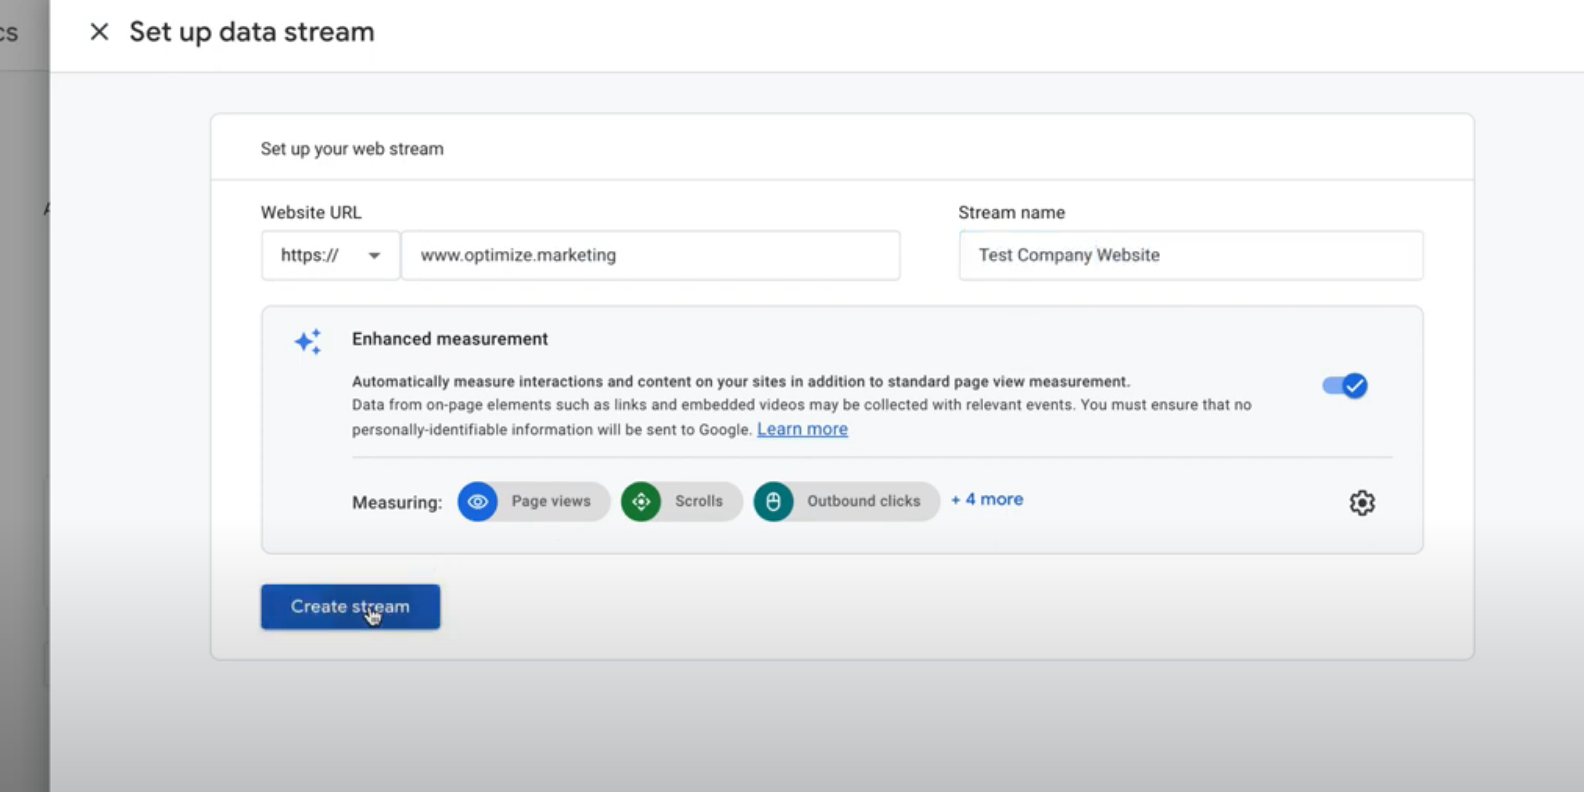
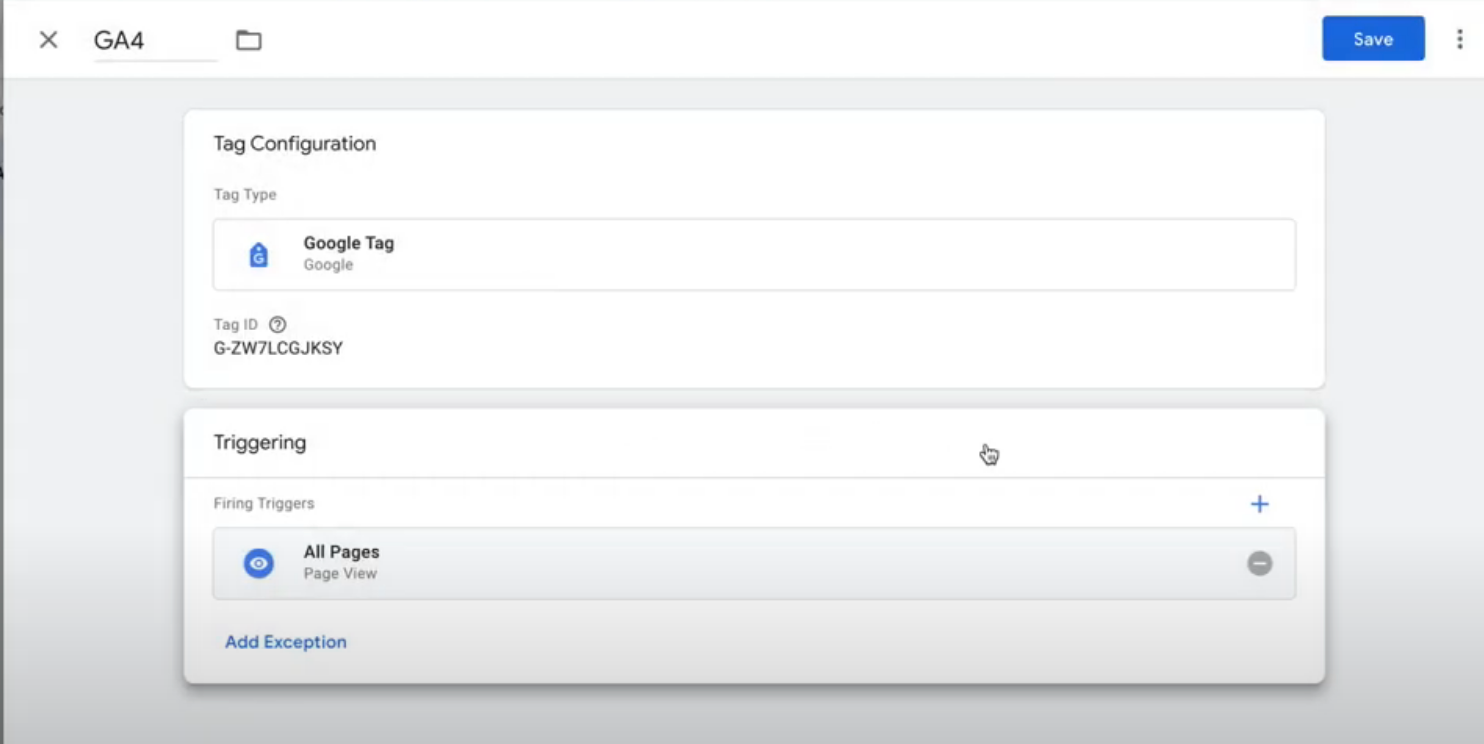
- Copy your measurement ID and go to GTM
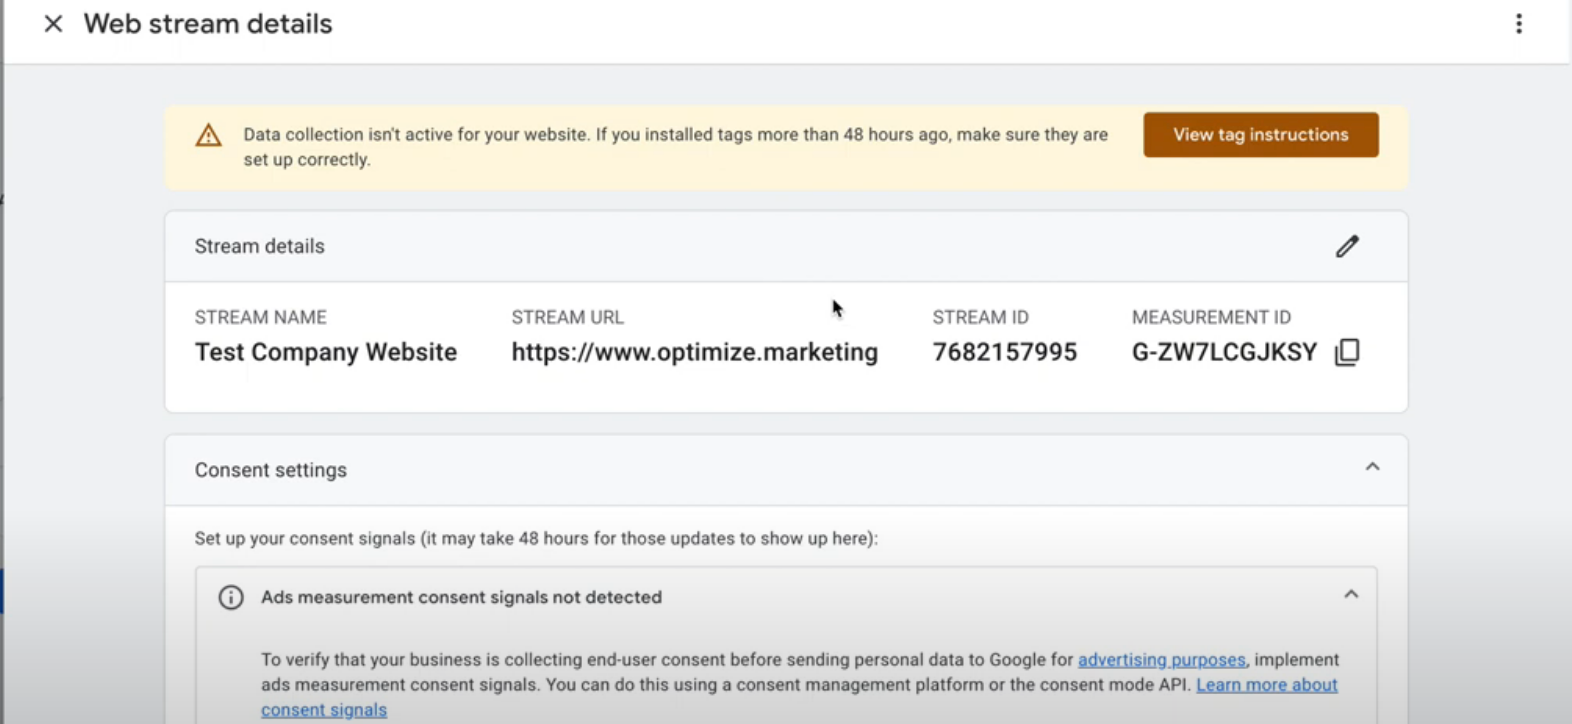
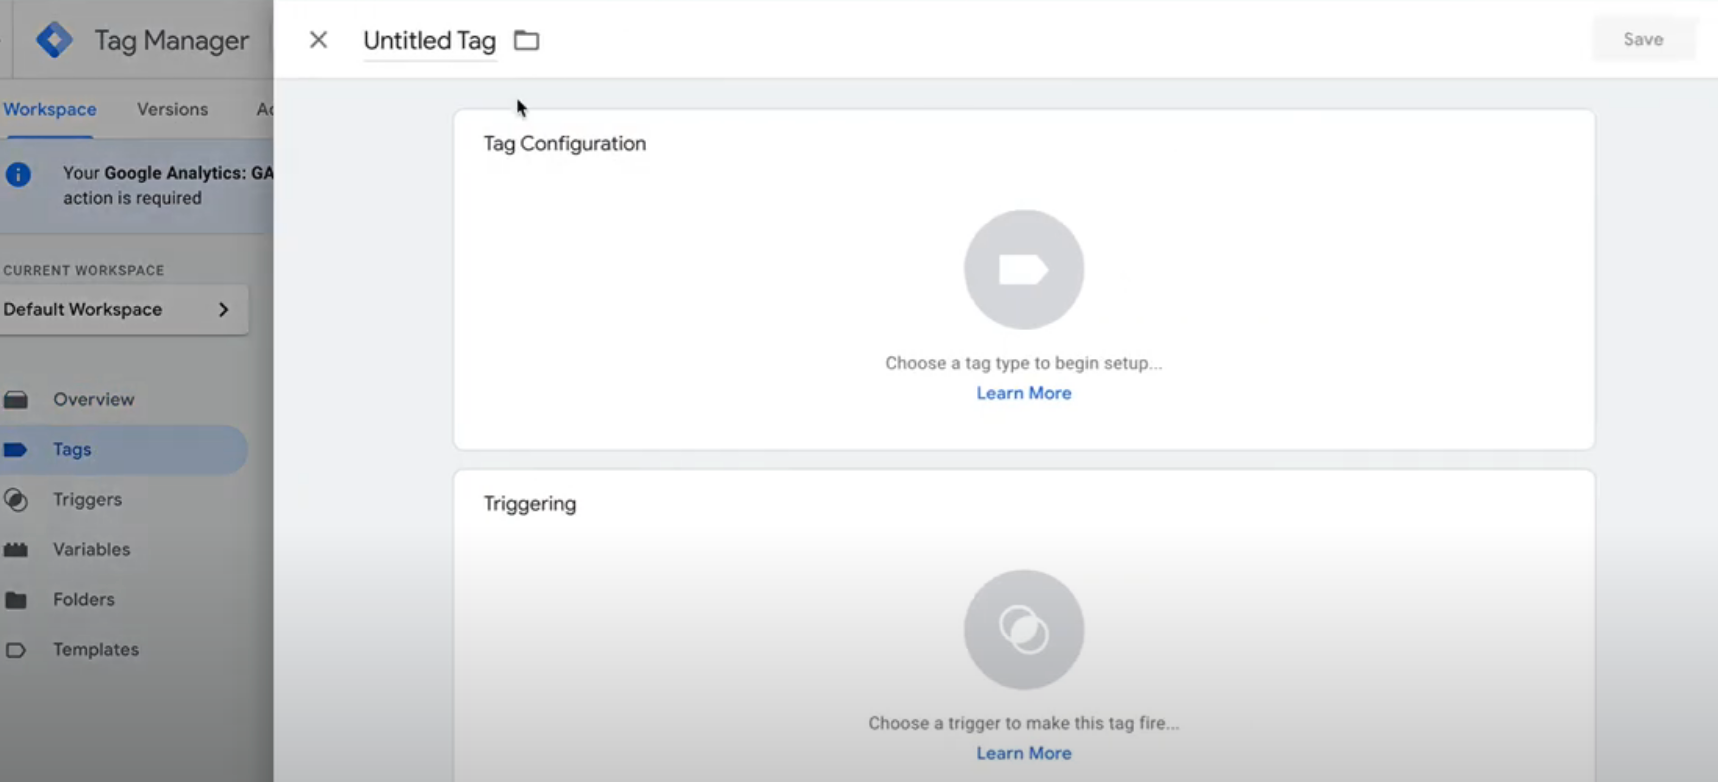
- Select Tags, New, and Select Google Tag
- Place the Measurement ID under Tag ID and Select All Page as the Trigger
- Publish your GTM
That's it, now your Google Analytics 4 tag is live on your website. You confirm this by using Google Tag Manager's debug tool or by using a Chrome extension like Wappalyzer to check if the tech has been pushed to your site.
Since Google Tag Manager was already installed on your website, then simply publishing inside of GTM pushes all new tags placed in your container to your website without having to re-publish your website.
How to Install HotJar on Google Tag Manager (GTM)
HotJar has a free plan where you can track qualitative feedback coming from your website.
This is in the form of heatmaps, session recordings, and scroll depth analysis.
These come in handy when you are trying to piece together, perhaps, a low time on page or high bounce rate.
The heatmaps and session recordings will indicate what is "sticking" and what is being lost in the shuffle.
So this is how to install Hotjar on your Google Tag Manager in 2024.
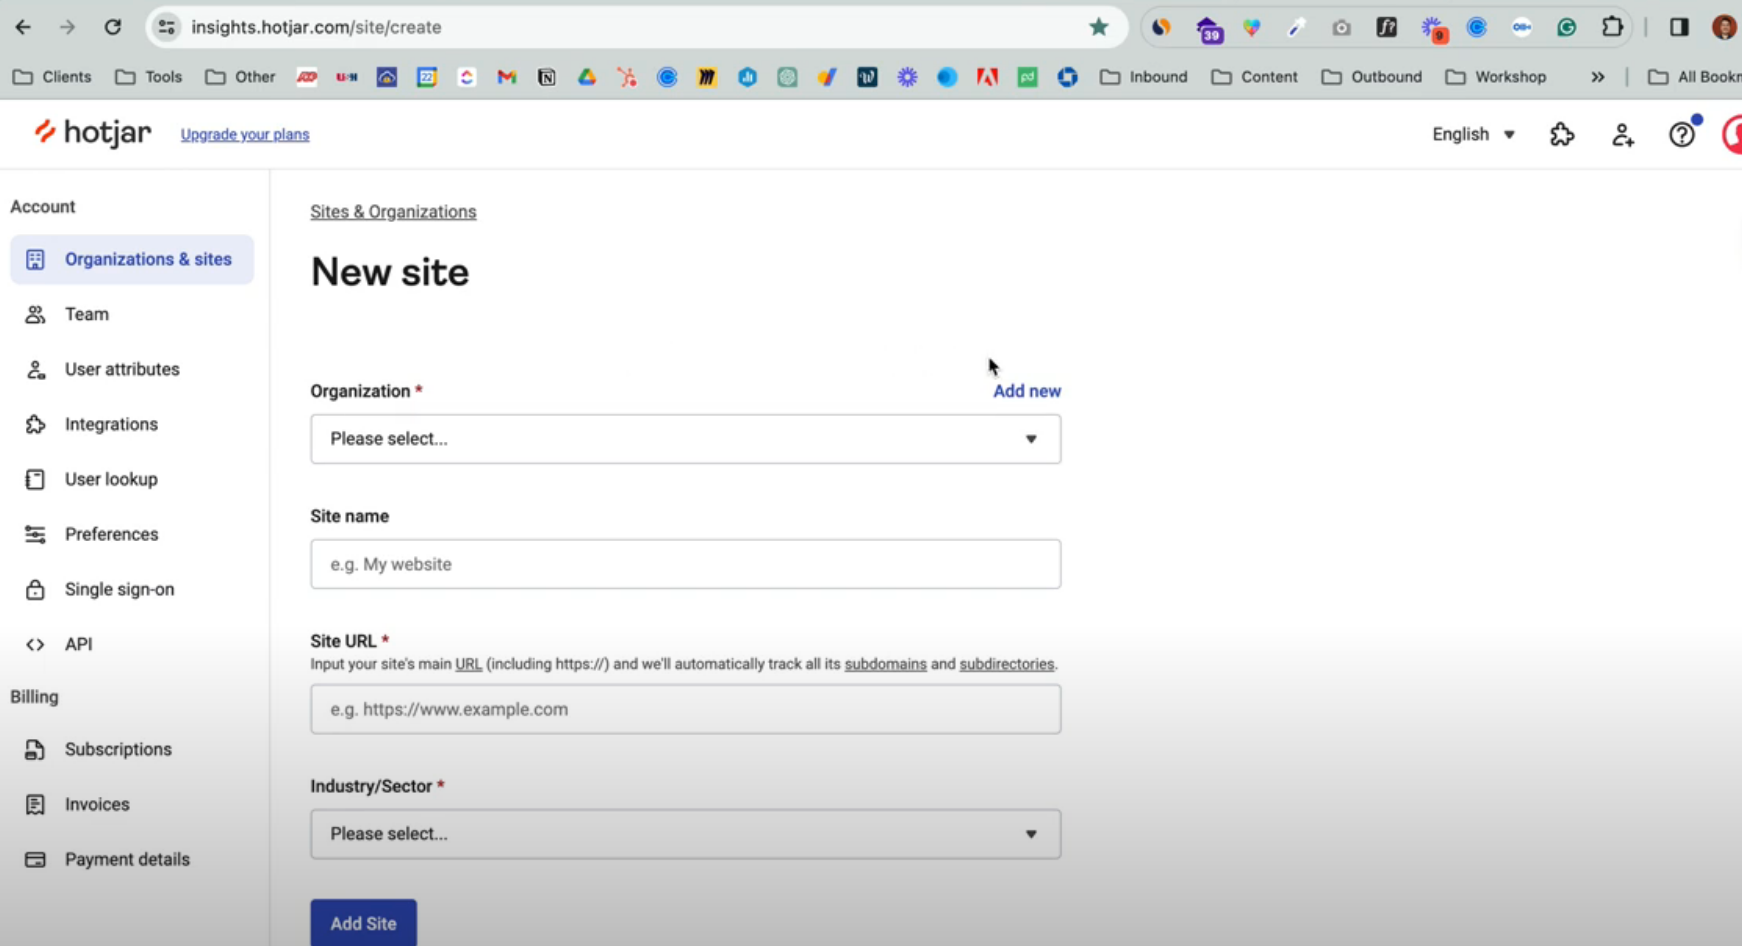
- Create a new Hotjar account by going to hotjar.io
- Simply complete the Organization, Site Name, and Site URL
- Then Select Add Site
- Find your site and Select Install Tracking
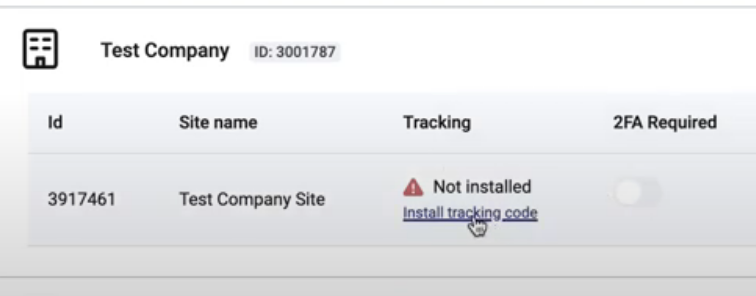
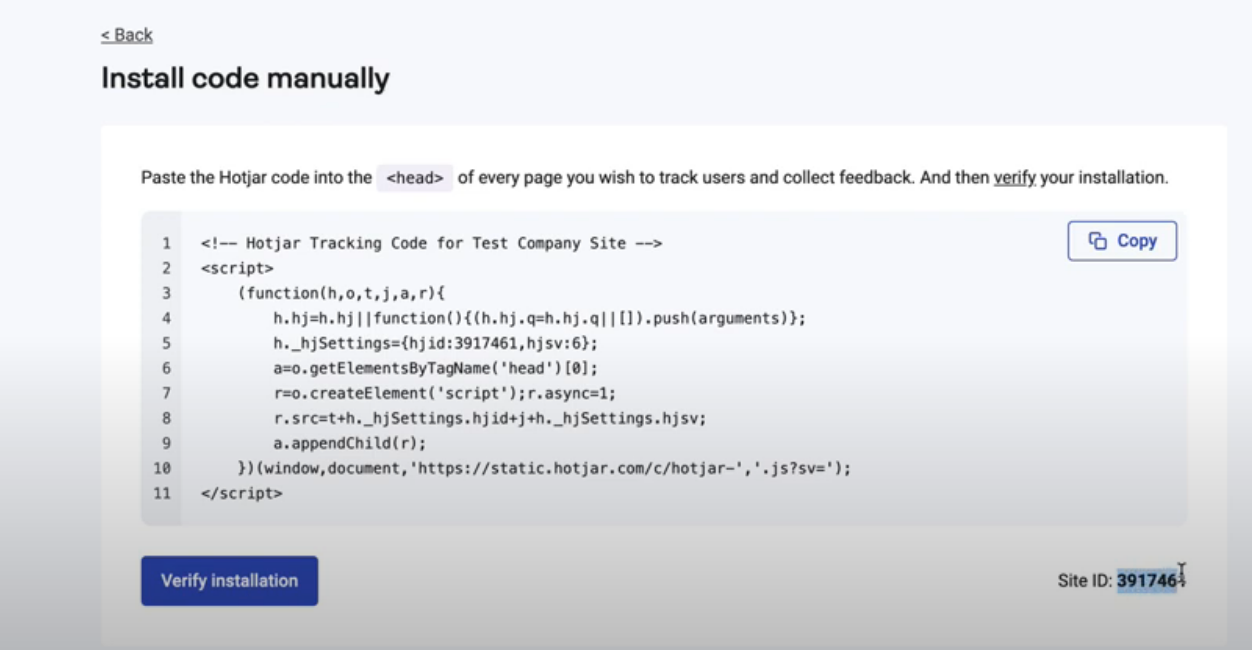
- You can install Hotjar 1 of 2 ways.
- Hotjar can automatically install this on your GTM by signing into your Google Account that your GTM was created under.
- You can create a new tag in GTM, search for Hotjar, and paste the ID seen above as the ID in the tag setup.
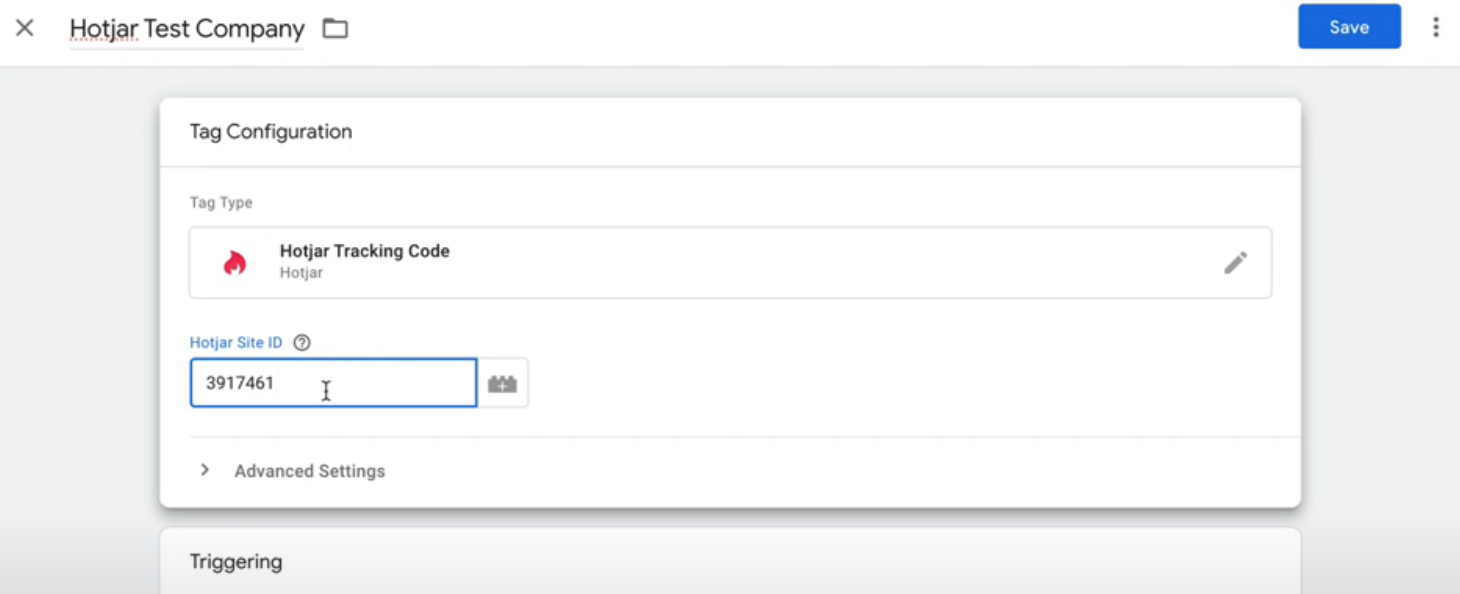
Last, select all pages as the trigger and then select Publish on your GTM!
Once that's done, you can check if it is published on your site by checking the debug tool in GTM or checking the source code using an easy Chrome extension like BuiltWith or Wappalyzer.
How to Install Microsoft Clarity On Your Google Tag Manager
Microsoft Clarity offers unlimited and free, Heatmaps and Session Recordings.
This will give you more qualitative data to use to help improve conversion rates on your website.
So let's begin:
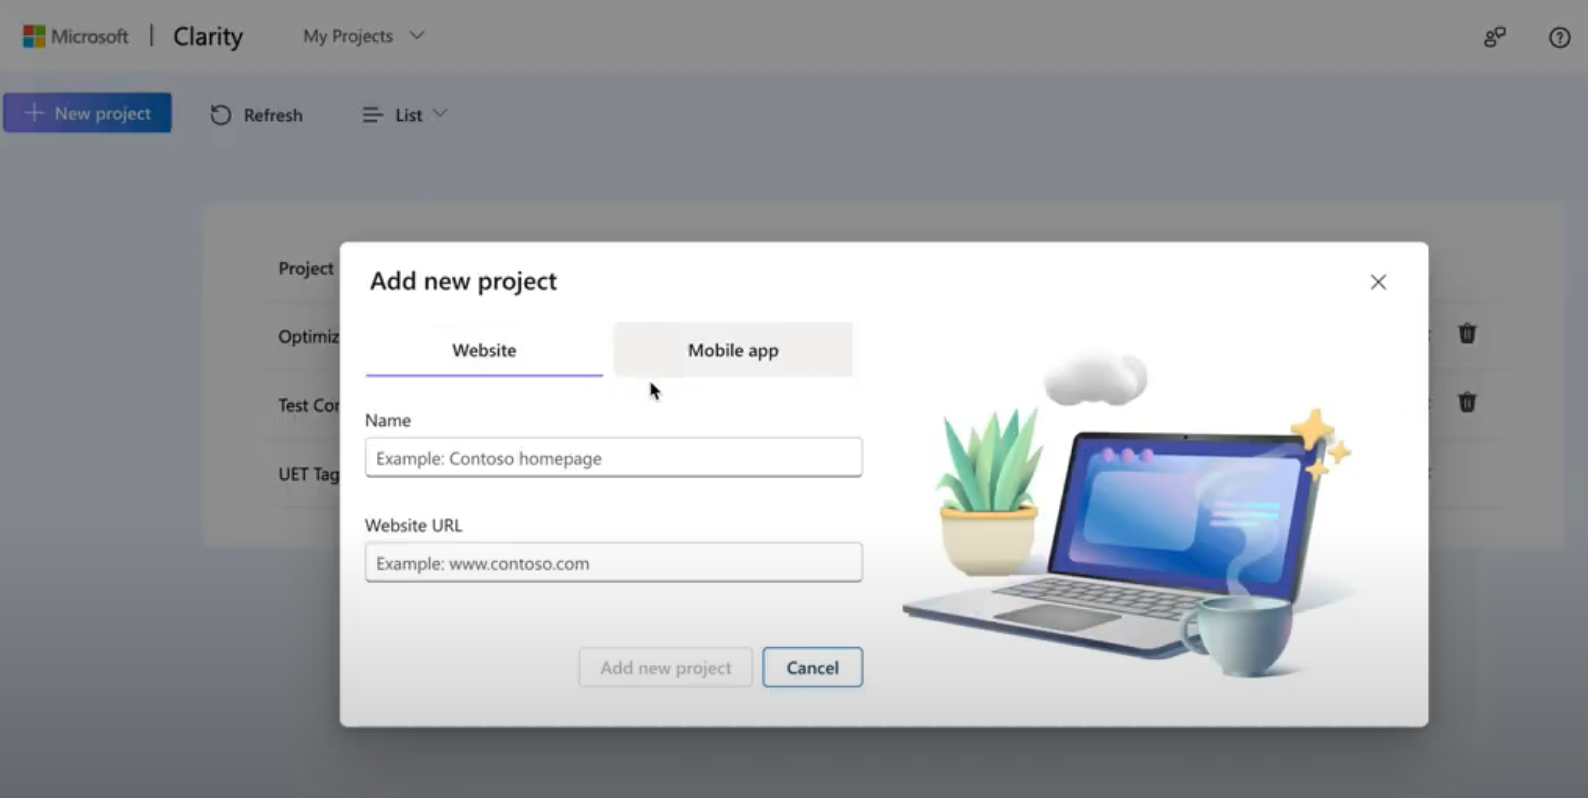
- Navigate to Microsoft Clarity Project Creation Screen
- Select New Project, Title Your Project, and place your website in the selector
- Select Start Setup For GTM
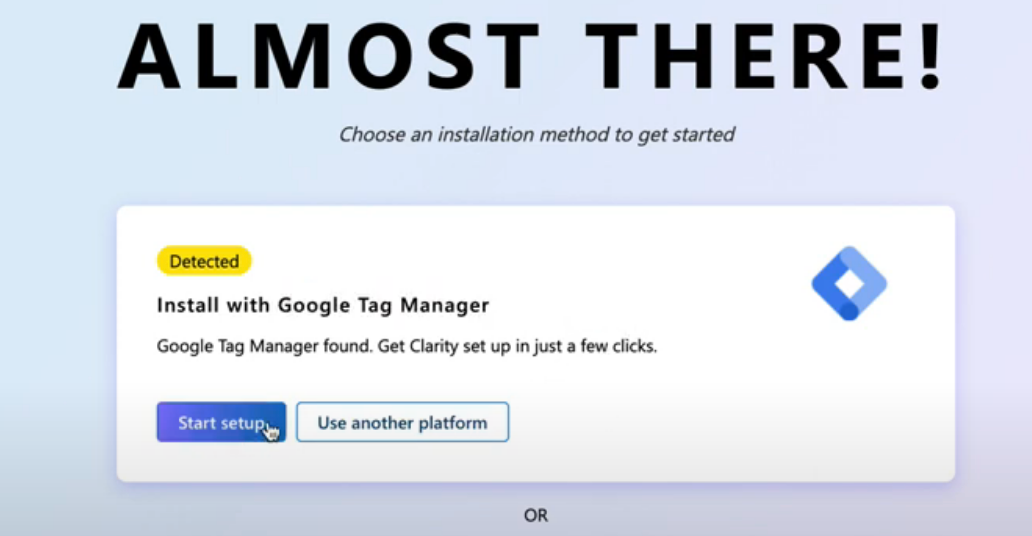
- Sign into your Google Account you used to sign up for your GTM and choose the container you want Clarity installed on.
- Confirm and publish!
At this point, you can confirm that your Clarity tag was installed by using GTM's debug tool or analyzing your website's source code.
How to Install Hubspot On Google Tag Manager
Hubspot is the most popular CRM to use for small to mid-sized B2B businesses.
We recommend it to all of our clients who aren't using a CRM yet.
By installing this free software, we will be able to easily track all of your company deals & tie back deal values into our ad accounts to optimize our campaigns

This is how you install it:
- Go to your Hubspot, Select Settings in the Top Right
- Select Tracking Tracking Code on the left-hand panel
- Copy the code and go to GTM
- Go to Tag, Create New Tag, and create a Custom HTML Tag
- Paste the code in the Tag Configuration panel and select all pages for the trigger.
- Save your tag and publish your container
That's it! Hubspot is installed.
You can check by using the debug tool on GTM or analyzing your company's source code using Wappalyzer.
How to Install Advertising Pixels On Your Website
The following pixels will relate to Google Ads, LinkedIn Ads, Meta Ads, and Bing Ads.
How to Install the Google Ads Tag on Webflow in 2024
To track conversions and remarket people who visit your website, you must place the Google Ads tag on your website.
This tag must be placed on the website, and not inside of GTM for it to fire correctly.
So let's dive into how to install this tag on Webflow.
If you site is on another builder, please note that this process is the same up until the installation of the tag on the website.
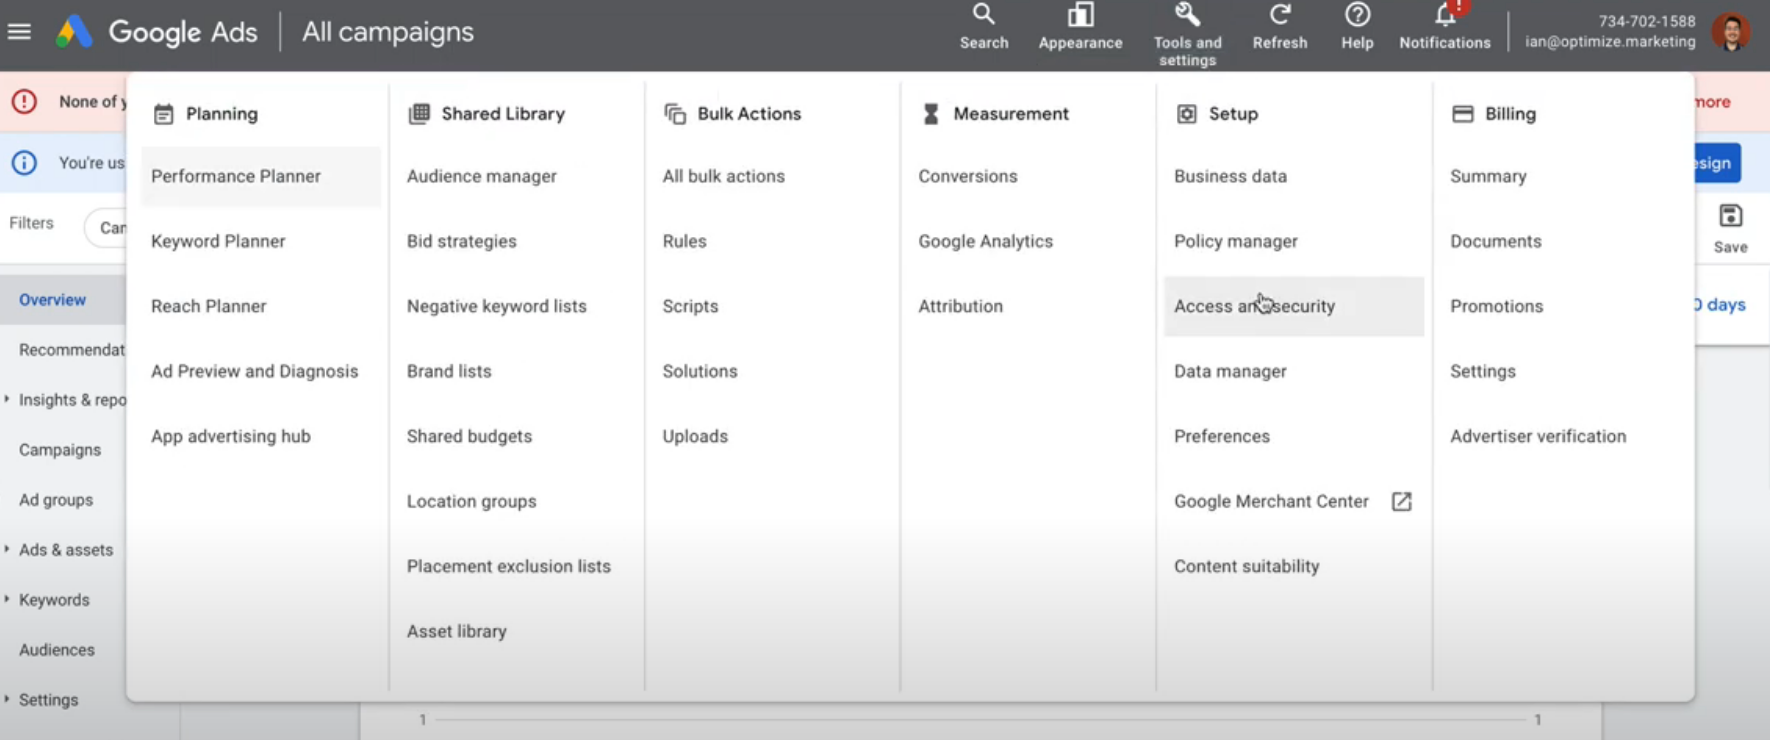
- Go to your Google Ads Account, select Tools & Settings & Click Data Manager
- From here, Click Manage by the Google tag, then select Installation Instructions & Install Manually
- Copy the code and go to your Webflow Website
- Similar to when we installed the GTM earlier in this blog, all you need to do is place the copied Google Tag into the Head of your Custom Code section.
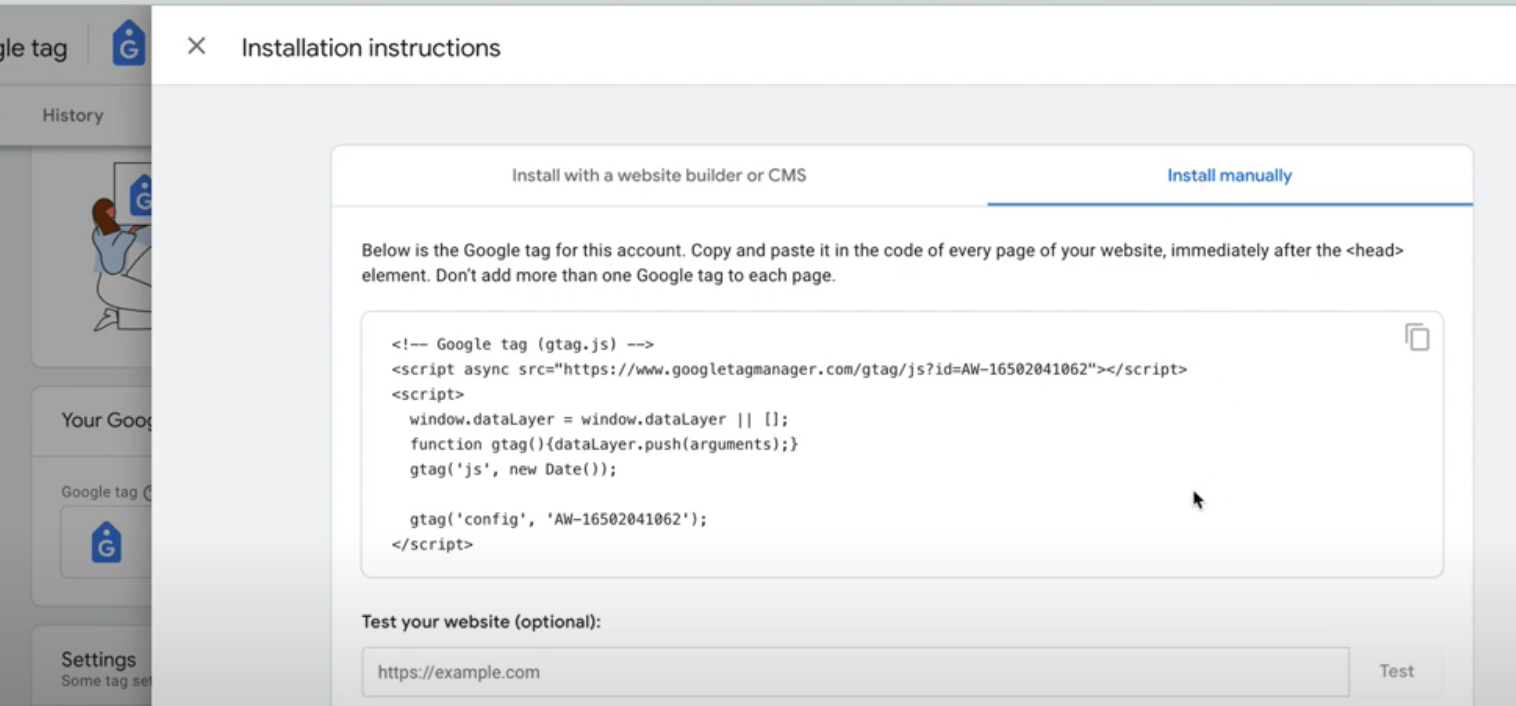
- Once that's done, simply publish your website and your Google Tag will be live.
This is the last piece of code that needs to be placed on your website - everything else we will cover in this blog can be published on your website using Google Tag Manager.
How to Install the LinkedIn Insight Tag On Google Tag Manager
The LinkedIn Insight tag allows you to track conversions on your website and to retarget previous website visitors.
This is crucial for setting up campaigns that have different messages presented to your prospects depending on their stage in the marketing funnel.
Here is how you can install it:
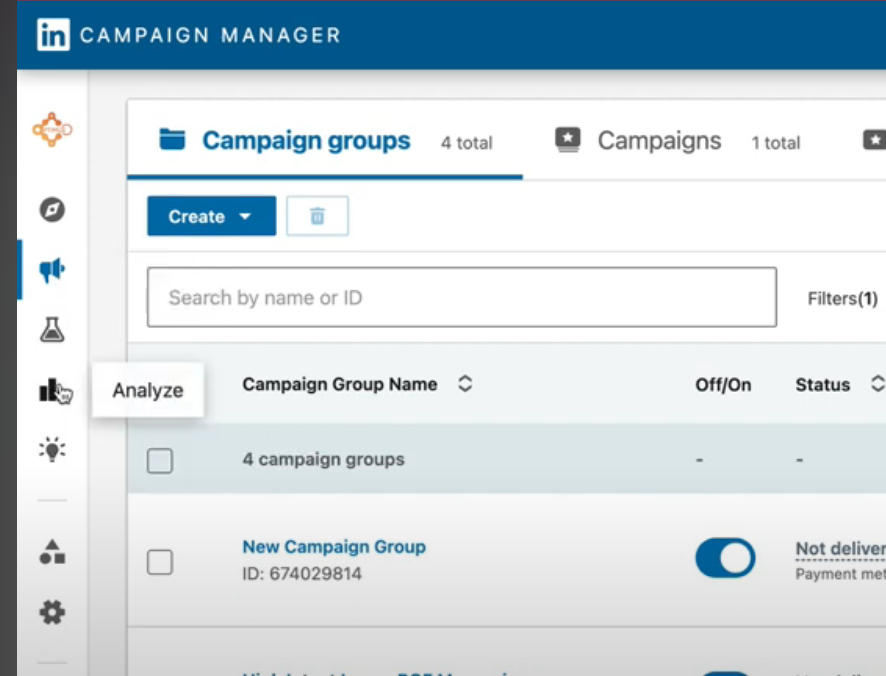
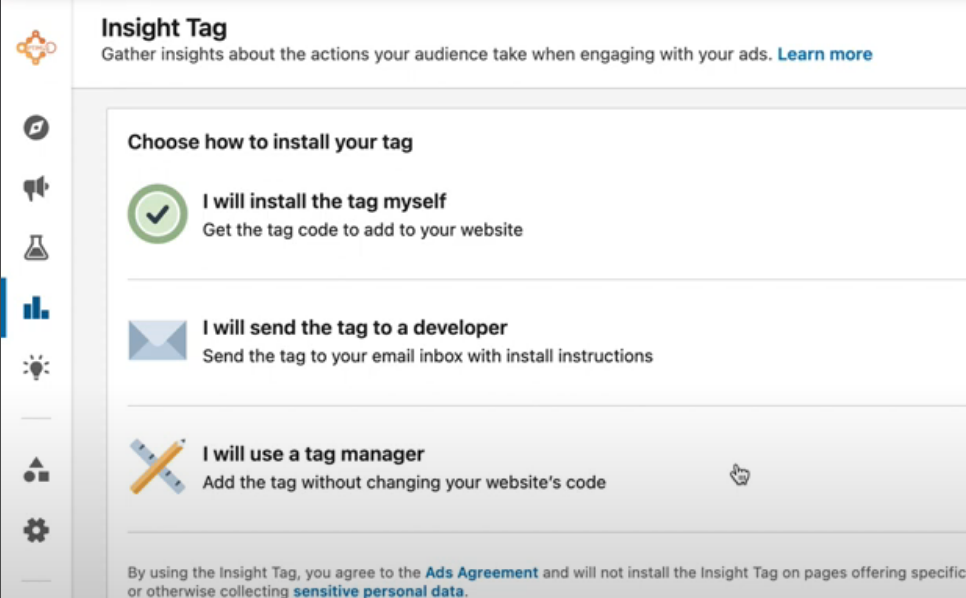
- Go to your LinkedIn Campaign Manager and select the Analyze Panel
- Select, "I will use a tag manager" and copy the Partner ID
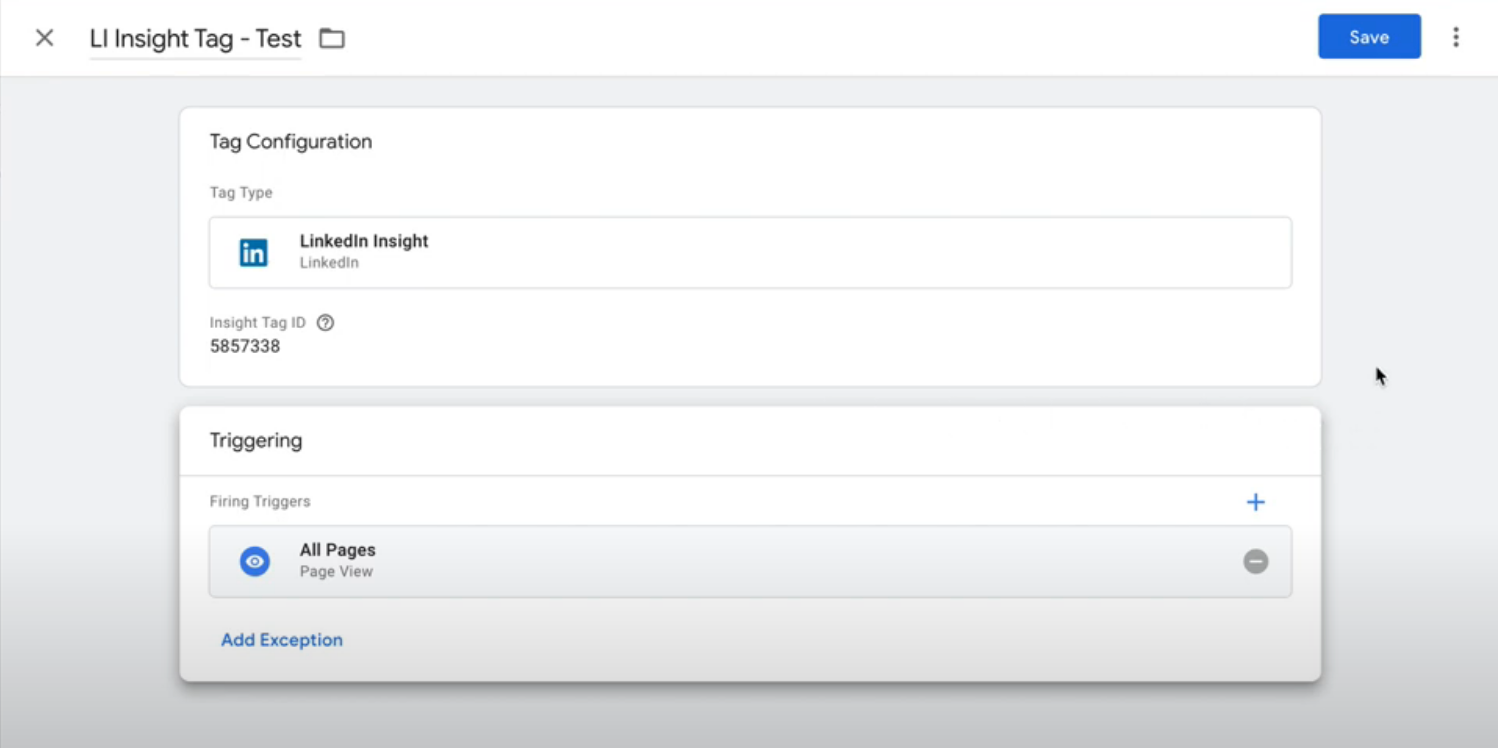
- Go to GTM and select Tags, New, and Search for LinkedIn Insight Tag
- Paste the ID, Select All Pages for the Trigger, and Save the tag
- Publish your GTM and your LinkedIn Insight Tag will be live!
How to Place Your Facebook Pixel on Google Tag Manager in 2024
Similar to the Google Ads Tag and LinkedIn Insight Tag - the Facebook pixel allows you to track conversions on your website, as well as retarget website visitors.
This is how you can set it up:
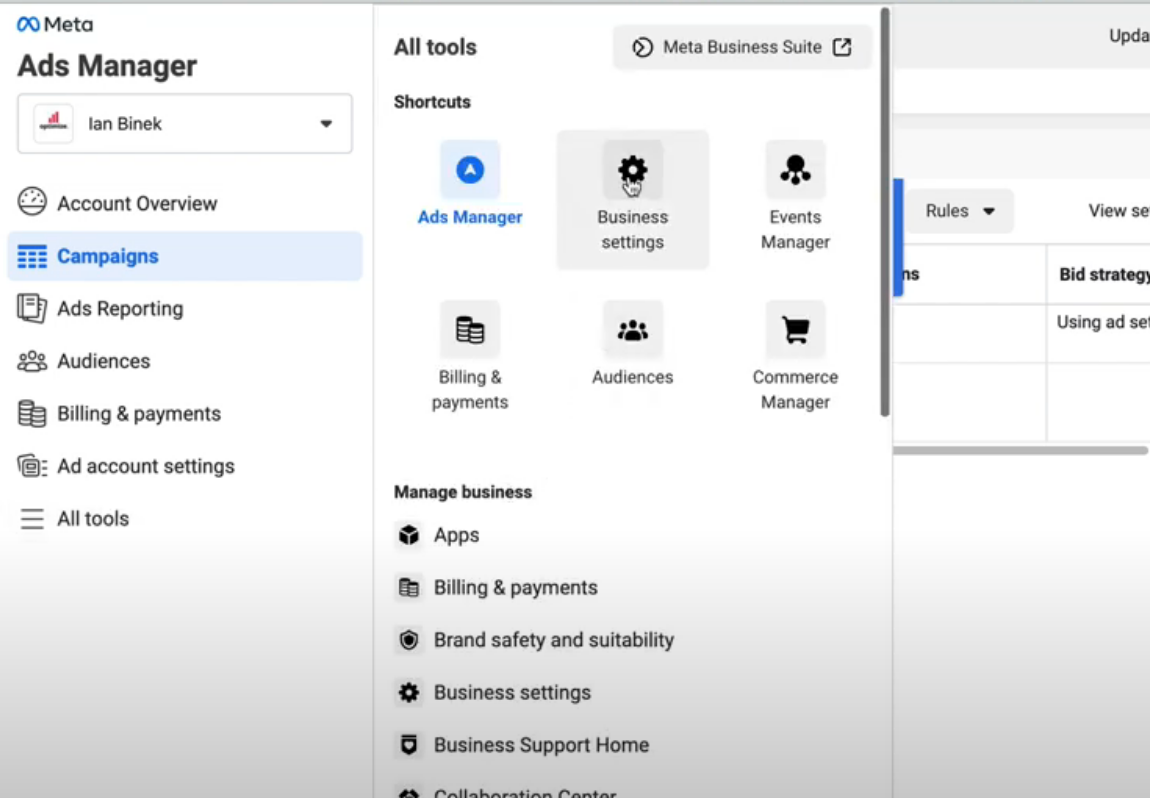
- First, go to your Facebook Ads Manager, Select All Tools, then All Settings
- Then select Data Sources, Pixels, and View Data Sets
- Click Add, create a new pixel then select Events Manager
- Next, select Setup Meta Pixel and copy the code from under the Install Manually section

In GTM all you need to do is:
- Go to GTM, select Tag, New, and Select Custom HTML
- Paste the HTML in the Tag Configuration Panel and Select All Pages as your trigger.
- Publish your GTM
As always, you can use the native Debug Tool in GTM or check your website's source code after publishing your container on GTM to ensure that the pixel was installed correctly.
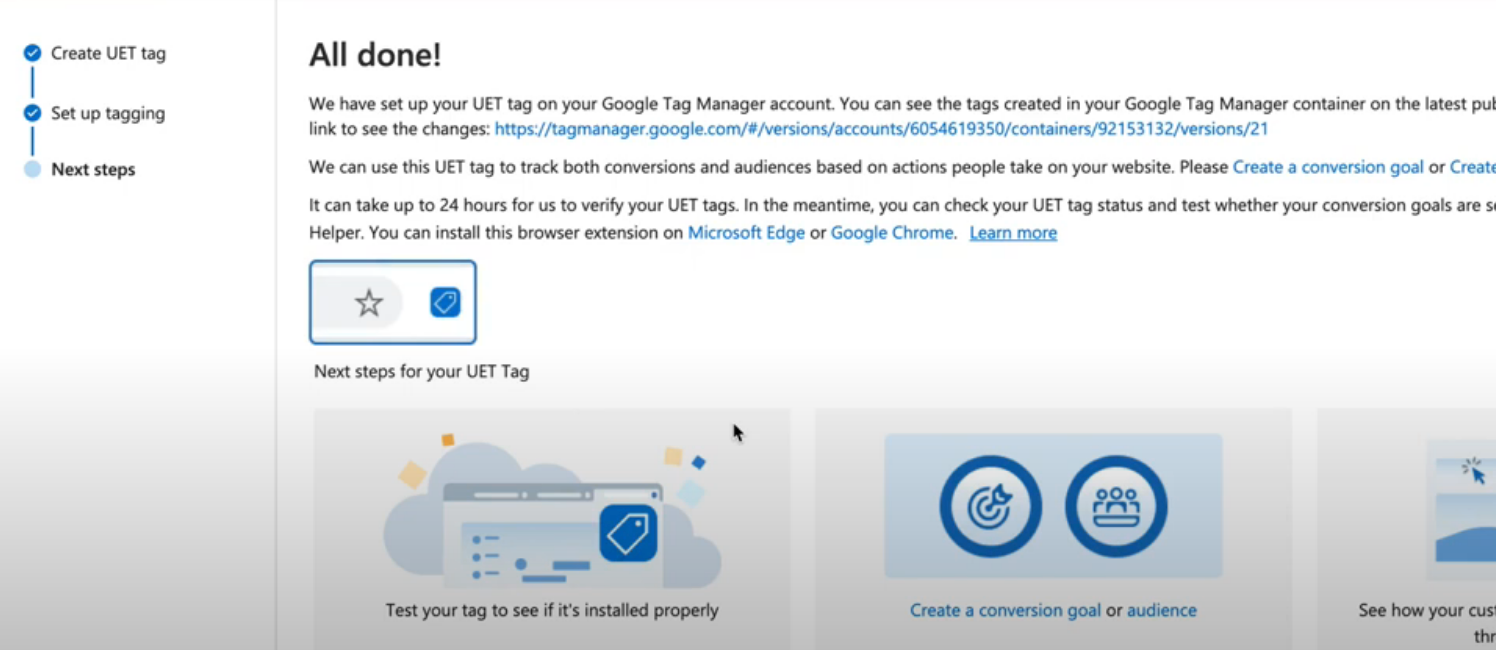
How to Install The Microsoft UET Tag On Google Tag Manager
The Microsoft (Bing Ads Pixel) is essentially the same as the Google Ads Tag.
However, setting this up will allow you to retarget users on Bing - which is why we recommend installing it.
Here how:
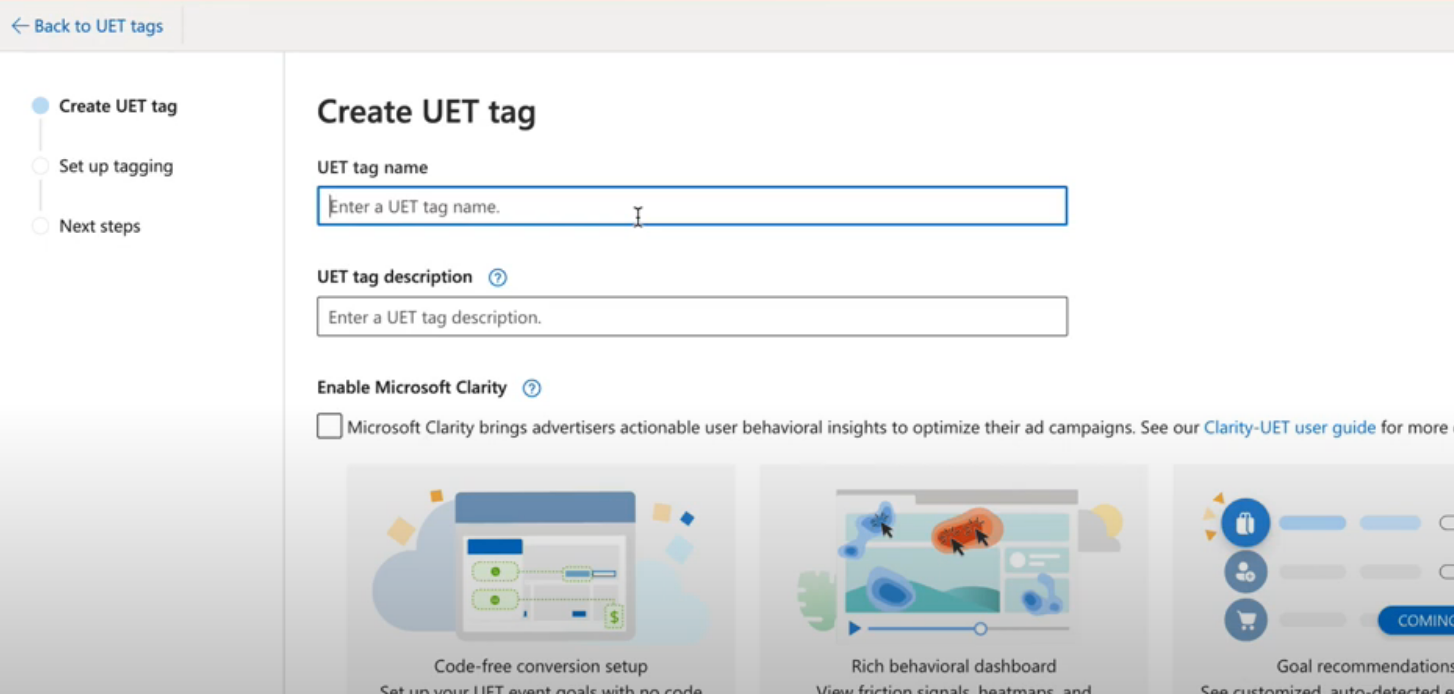
- Go to your Microsoft Ads account, select Tools, then UET Tag
- Select Create, Name the Tag, Select Next, then Automatically Add Tracking Tag using Google Tag Manager.
- Sign into your Google Account that you used to create your Google Tag Manager and select the container you want the UET Tag to be installed in.
- Voila! Confirm your tag has been placed by publishing your GTM.
Wrapping Up
These 9 free software are the ones we highly recommend all of our clients install on their website.
There will certainly be other pieces of tech that we recommend you install, but these core analytics and advertising pixels will provide an incredible baseline of data to work with and improve your marketing performance.
If you have any questions, be sure to reach out to our team.
We would be happy to help!
Until next time.